
How to Check Centering on Pokémon Cards Before Grading
PullBull TeamUpdated 9 min read
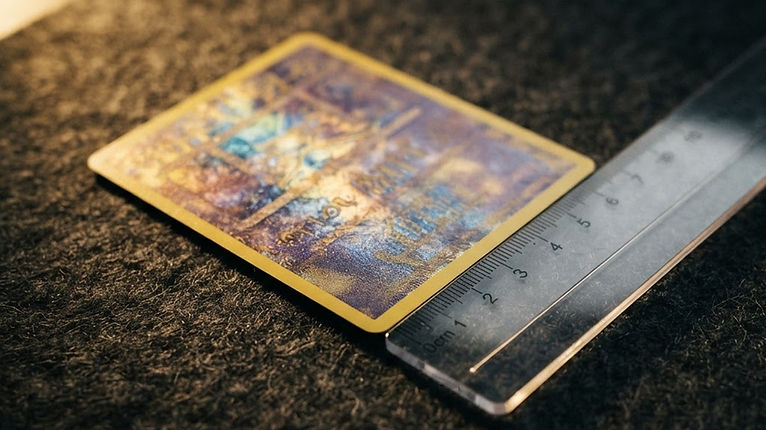
You pulled a great card. The corners look sharp, the surface is clean, and you are already picturing a 10 on the label. Then the grade comes back lower than you hoped, and the reason is one you could have spotted at home: centering.
Centering is one of the easiest condition points to check yourself, and one of the most common reasons a clean-looking card misses a top grade. This guide shows you how to measure it, how to turn your measurements into the ratios graders talk about, what to check on the back, and how to use the result to decide whether a card is worth sending in.
Centering is how evenly the artwork and printed frame sit inside the card. On most Pokémon cards you judge it by looking at the borders around the edge, for example the yellow border on many English cards.
When one border is wider than the opposite one, the card is off-center. Collectors describe this as a ratio, such as 50/50 (perfect), 55/45 (slightly off) or 70/30 (clearly off).
Centering is set at the factory when cards are cut from a printed sheet. It cannot be fixed later, which is why it matters so much to graders and buyers.
Grading companies look at four main things: corners, edges, surface and centering. A card can be close to perfect on the first three and still be held back by centering.
That makes centering a useful first filter. If a card is clearly off-center, you can often skip the grading fee and sell or keep it raw. If you are still deciding whether grading makes sense at all, read is it worth grading Pokémon cards? first.
You do not need special equipment. Any of these will work:
Handle the card by its edges, and if it is valuable, measure it inside a clean, clear penny sleeve so you do not scratch the surface.
Place the card face up on a flat surface. Look straight down at it, not at an angle. Viewing at an angle makes one border look wider than it is.
Measure the width of the left border, from the outer edge of the card to the inner edge of the border, where the artwork frame begins. Then measure the right border the same way. Write both numbers down.
Do the same for the top and bottom borders.
Add the two opposite borders together, then work out what share of the total the wider border takes.
Example: the left border is 3 mm and the right border is 2 mm.
So the card is 60/40 left to right.
Another example: left 2.5 mm, right 2.5 mm gives 50/50, which is perfect. Left 3.5 mm, right 1.5 mm gives 70/30.
Repeat the same math for top and bottom. A card has two front ratios, one for each direction, and the worse of the two is usually what holds the grade back.
Flip the card and measure the blue border on the back the same way. Graders check back centering as well, but they are usually more forgiving on the back than on the front.
Take a straight, well-lit photo of the front and back and zoom in. Small differences that are hard to see by eye are often clearer on screen. Our guide on how to photograph trading cards shows how to get flat, glare-free shots, which also helps when you list the card later.
Each grading company publishes its own grading standards, and they can change, so always check the current standards on the grader's own website before you submit.
As a general guide, PSA's published standards describe a Gem Mint 10 as roughly 55/45 to 60/40 or better on the front and about 75/25 or better on the back. Lower grades allow more off-center cards. BGS and CGC use their own scales, and their very top labels tend to expect centering very close to 50/50.
What this means in practice:
If you want to compare how the big graders differ, see PSA vs CGC vs BGS for Pokémon cards.
A perfectly centered card with a dented corner or a scratched holo will not get a top grade. Once centering passes, check:
Our trading card condition and grading guide walks through each of these in detail.
When selling raw cards, mention centering honestly in your description and include clear front and back photos. Buyers who plan to grade will look for it. Good centering is a real selling point, so show it.
When buying raw cards to grade, centering is one of the few things you can check from photos with confidence. Measure it before you bid. If you are buying through auctions, our guide on how to win online card auctions covers setting a maximum bid so you do not overpay for a card that may not grade well.
When pricing, compare recent sold prices for the same card in a similar condition or grade. See how much are my Pokémon cards worth? for how to check this.
Protect cards right after checking them. A penny sleeve and a toploader keep a well-centered card from picking up the corner or surface damage that would cost it a grade. See how to store Pokémon cards.
PullBull is a collector-focused marketplace built around timed auctions and seller stores, where buyers can watch auctions and follow the stores they like. PullBull is in an early, pre-launch stage, so listings are still limited. Paid checkout and payment protection are not active yet. Buyers and sellers use the contact seller button to agree on payment, packing and postage before going ahead. Learn more in what is PullBull? and how online card auctions work.
Looking for well-centered Pokémon cards? Browse auctions on PullBull.
How do you check centering on a Pokémon card? Measure the width of the left and right borders, then the top and bottom borders. Add each pair together and work out what share the wider border takes. For example, 3 mm and 2 mm gives 60/40.
What does 60/40 centering mean? It means one border takes up 60% of the combined border width and the opposite border takes 40%. The card is slightly off-center in that direction.
What centering do you need for a PSA 10? PSA's published standards describe a Gem Mint 10 as roughly 55/45 to 60/40 or better on the front and about 75/25 or better on the back. Check PSA's website for the current standards before submitting.
Does back centering matter for grading? Yes. Graders check the back as well, though they usually allow more off-center backs than fronts.
Can you fix bad centering on a card? No. Centering comes from how the card was cut at the factory. Trimming a card to change its centering is considered tampering and graders reject altered cards.
Is an off-center card worth grading? Sometimes. A rare or vintage card can still be worth grading at a lower grade. For common modern cards, poor centering often means the fee is not worth it. Compare recent sold prices at the grades you can realistically expect.
Do I need a special tool to measure centering? No. A clear millimeter ruler or a straight-on phone photo works. A transparent centering tool makes it faster, especially for full-art cards.
Centering is the condition check you can do in two minutes at home, and it can save you from paying to grade a card that was never going to get a top grade. Measure both directions on the front, check the back, turn your numbers into a ratio, and compare against the grader's published standards. Then check corners, edges and surface before you decide. When you are ready to browse or list cards, visit PullBull.
Related: Is it worth grading Pokémon cards? · PSA vs CGC vs BGS for Pokémon cards · Trading card condition and grading guide · How to store Pokémon cards
Browse live auctions and listings on PullBull.
Browse Pokémon card auctions on PullBull